Tutorial
This tutorial use case is:
Search for the resumes (PDF or Word file which resides in One drive or local) and search for anything in the content using Kibana. For example location worked or the previous company, etc.
Prerequisites
- Java 11+ must be installed
JAVA_HOMEmust be defined
Install Elastic stack
- Download Elasticsearch
- Download Kibana
- Start Elasticsearch server
- Start Kibana server
- Check that Kibana is running by opening http://localhost:5601
Start FSCrawler
- Download FSCrawler. See Download FSCrawler.
- Open a terminal and navigate to the
fscrawlerfolder. - Type:
# On Linux/Mac
bin/fscrawler resumes
# On Windows
.\bin\fscrawler resumes
- It will ask “Do you want to create it (Y/N)?”. Answer
Y. - Go to the FSCrawler configuration folder to edit the job configuration. The FSCrawler configuration folder named
.fscrawleris by default in the user home directory, likeC:\Users\myuseron Windows platform or~on Linux/MacOS. In this folder, you will find another folder namedresumes. Enter this folder:
# On Linux/Mac
cd ~/.fscrawler/resumes
# On Windows
cd C:\Users\myuser\resumes
- Edit the
_settings.yamlfile which is in this folder and change theurlvalue to your folder which contains the resumes you would like to index:
---
name: "resumes"
fs:
  # On Linux
  url: "/path/to/resumes"
  # On Windows
  url: "c:\\path\\to\\resumes"
- Start again FSCrawler:
# On Linux/Mac
bin/fscrawler resumes
# On Windows
.\bin\fscrawler resumes
FSCrawler should index all the documents inside your directory.
Note
If you want to start again reindexing from scratch instead of monitoring the changes, stop FSCrawler, restart it
with the --restart option:
# On Linux/Mac
bin/fscrawler resumes --restart
# On Windows
.\bin\fscrawler resumes --restart
Create Index pattern
- Open Kibana
- Go to the Management page
- Open the Index Patterns page under Kibana settings.
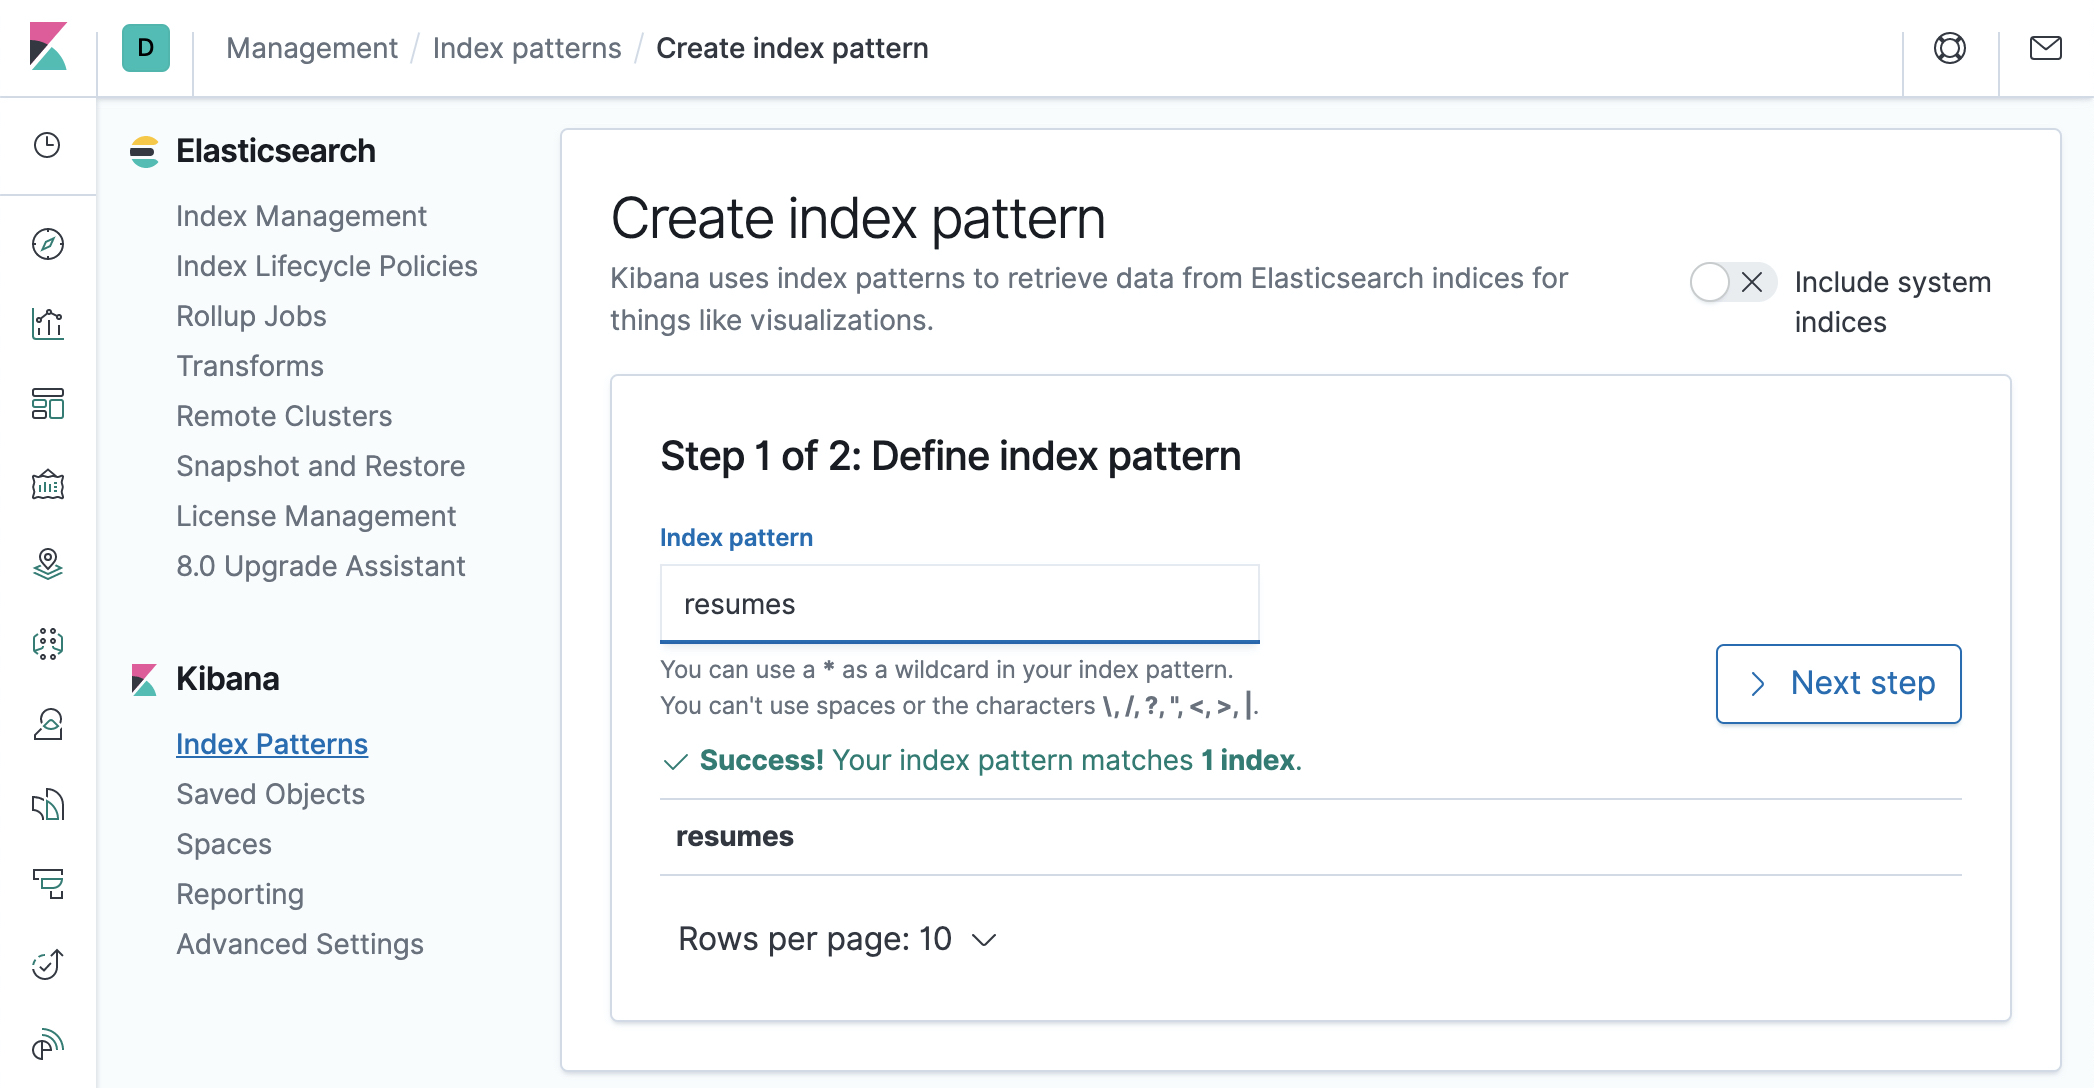
- Click on
Create index pattern - Type
resumesin the input box. Don’t forget to remove the star*that is automatically added by default by Kibana.
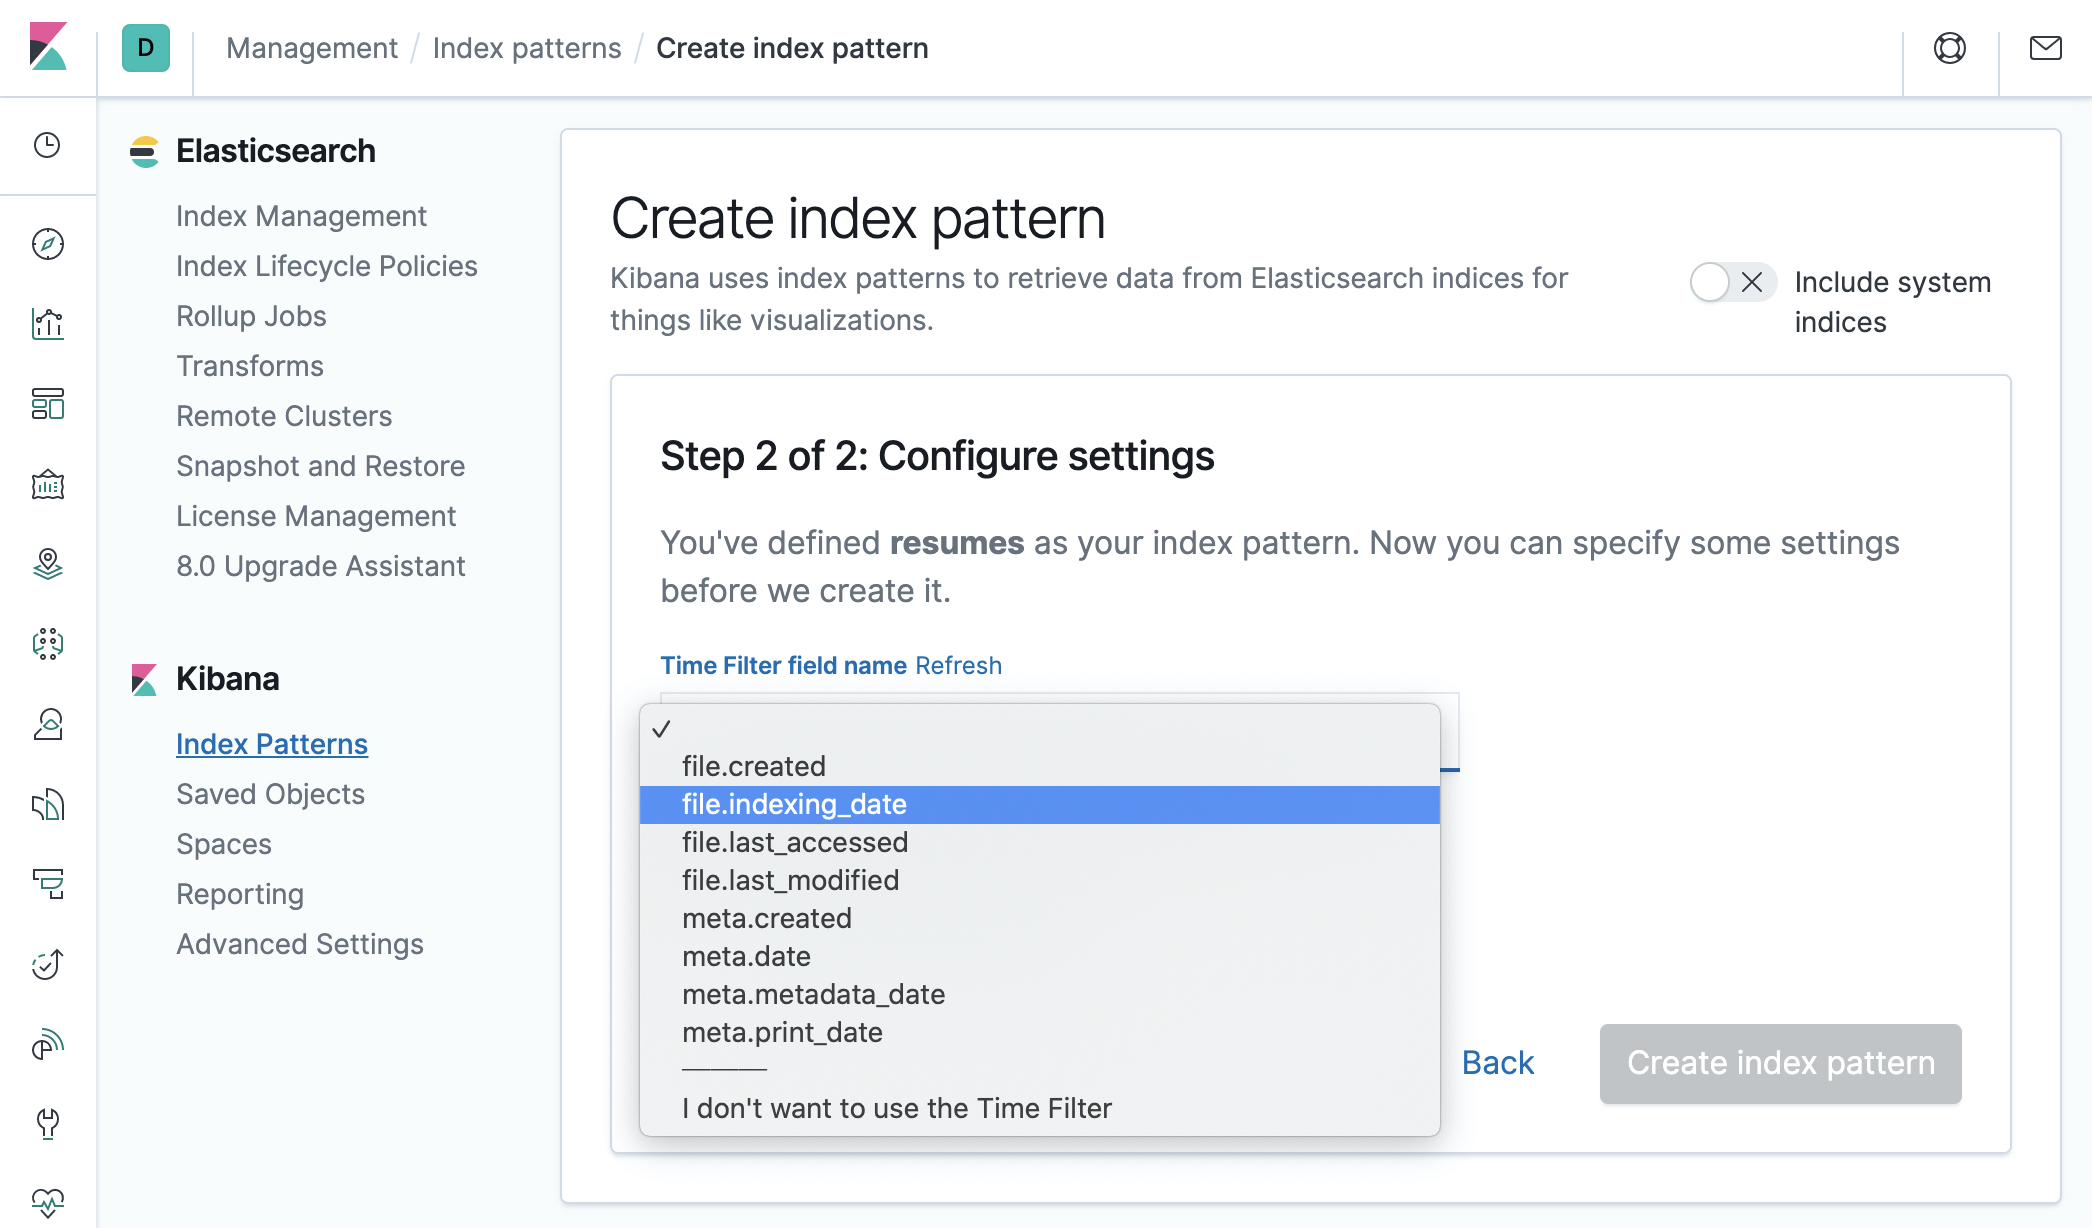
- Choose the date field you’d like to use if you want to be able to filter documents by date. Use
file.createdfield if you want to filter by file creation date,file.last_modifiedto filter by last modification date orfile.indexing_dateif you want to filter by the date when the document has been indexed into elasticsearch. You can also choose not to use the time filter (the last option).
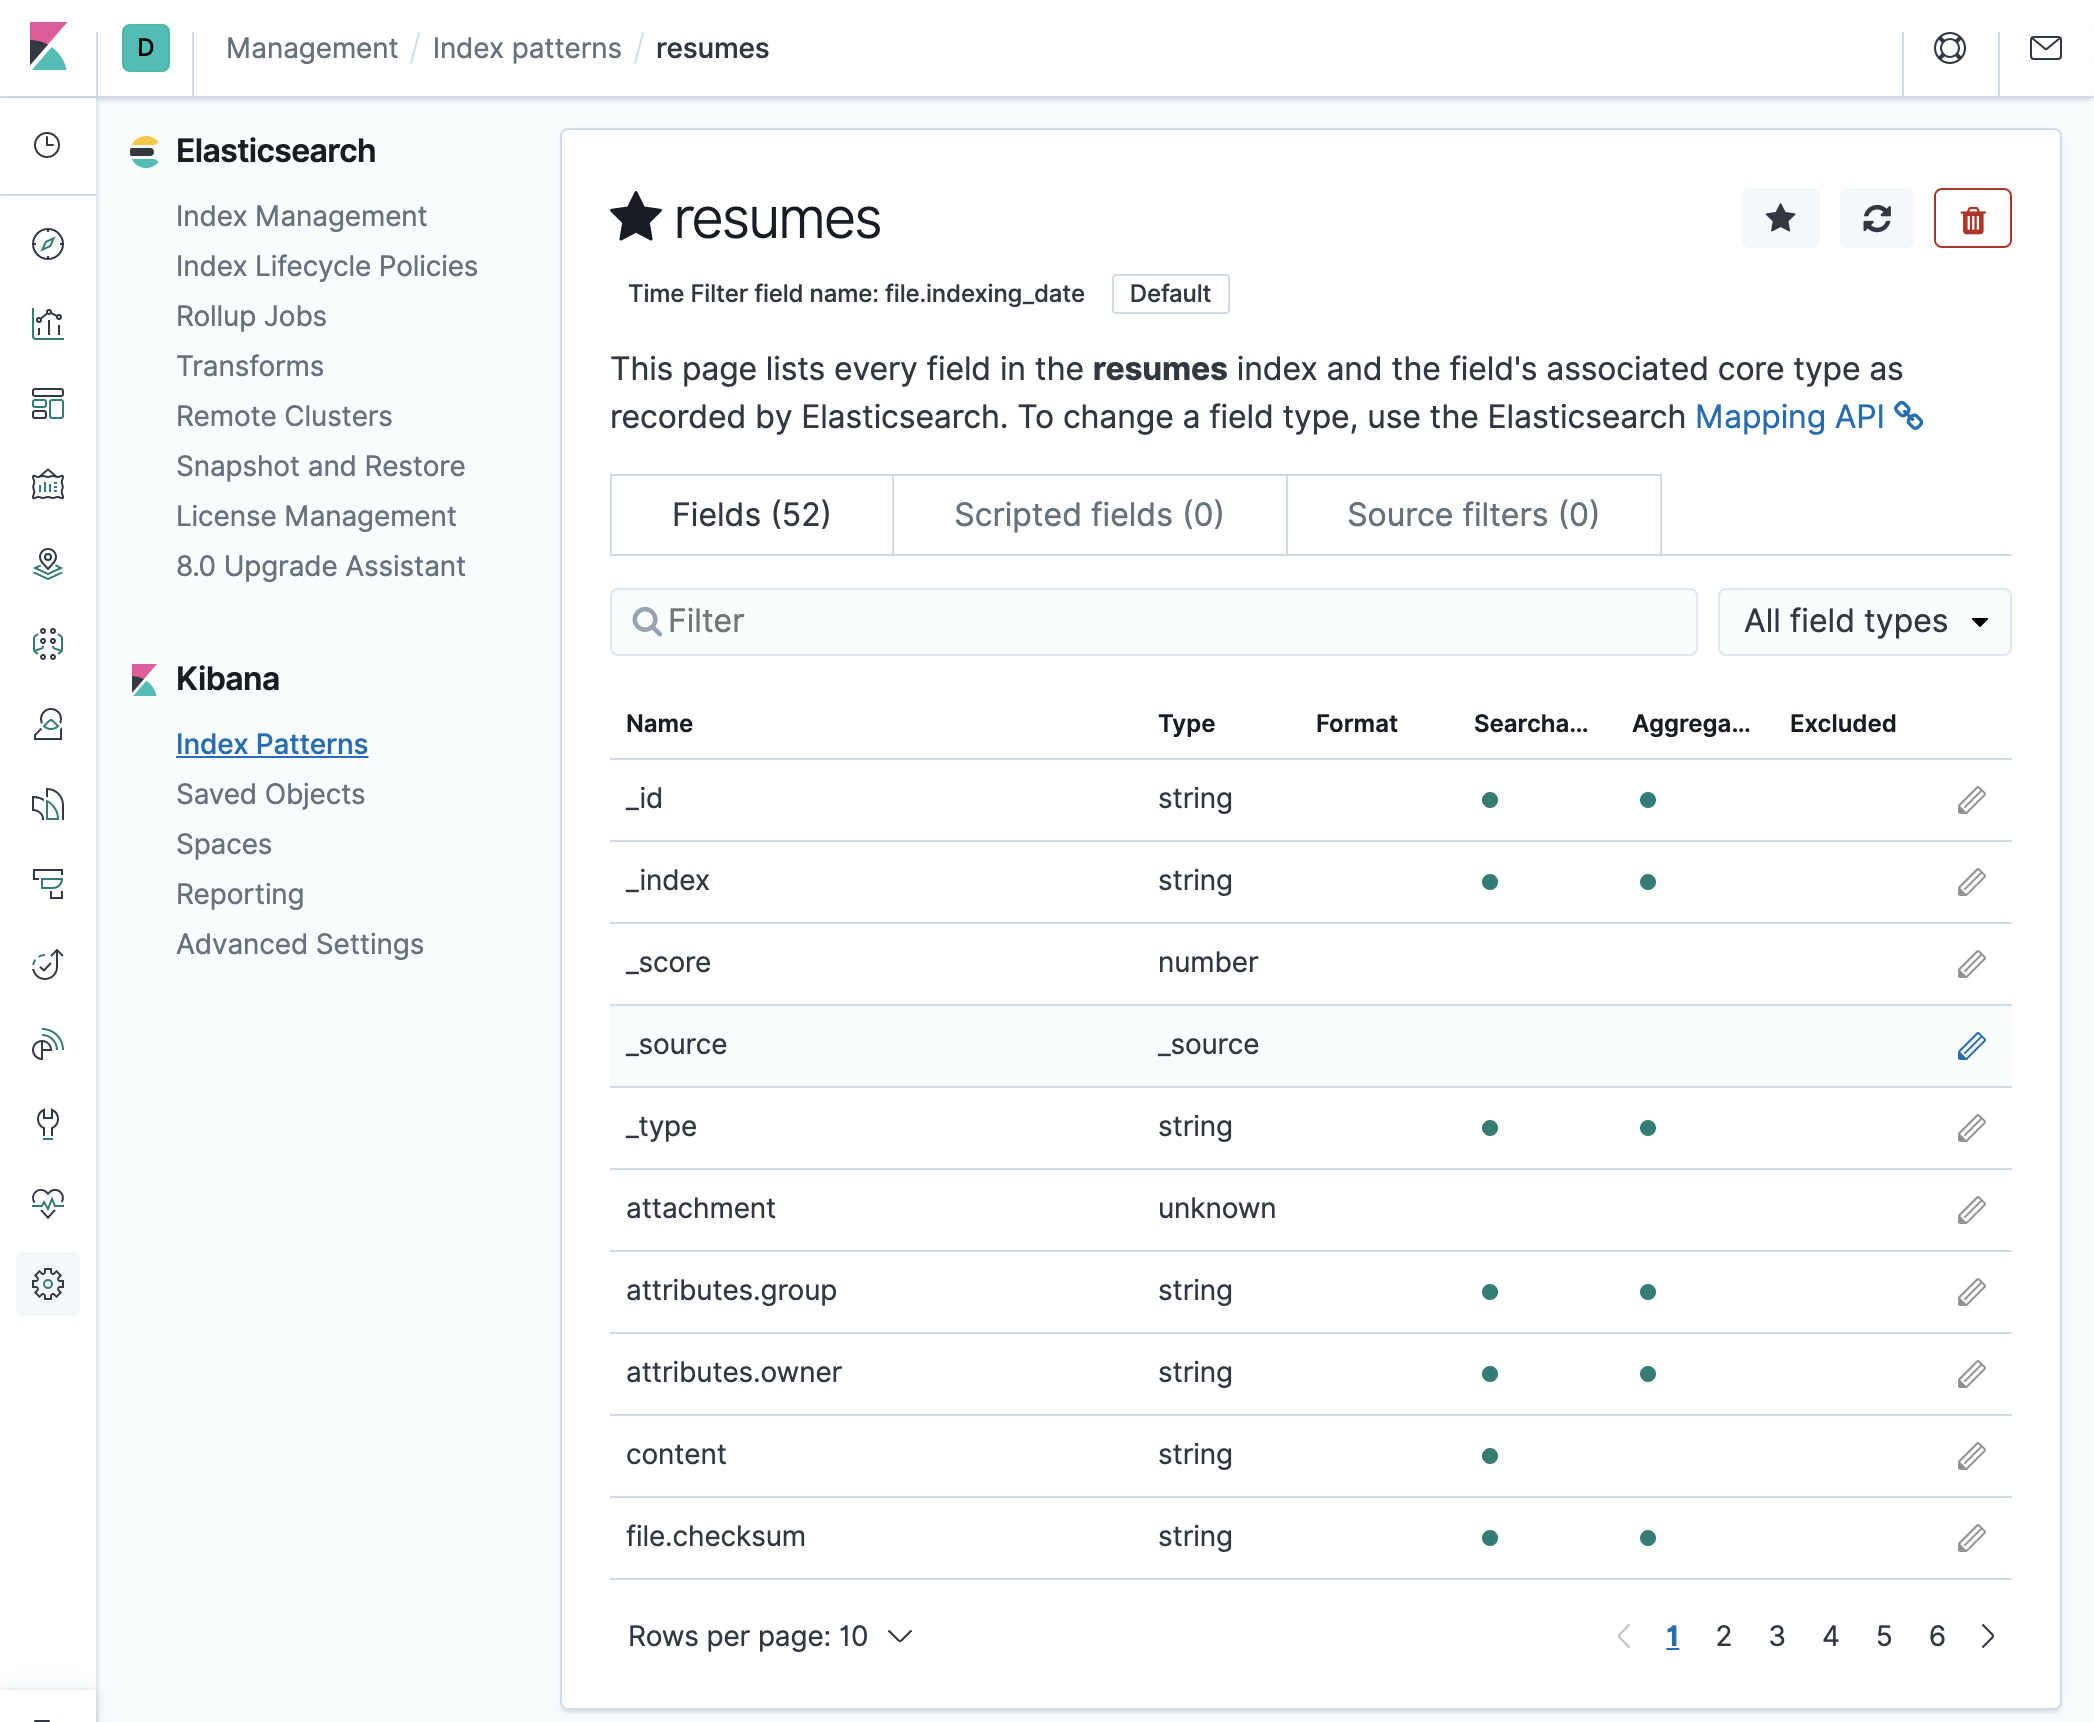
- Click on “Create index pattern”. You should see something like:
Search for the CVs
- Open Kibana
- Go to the Discover page
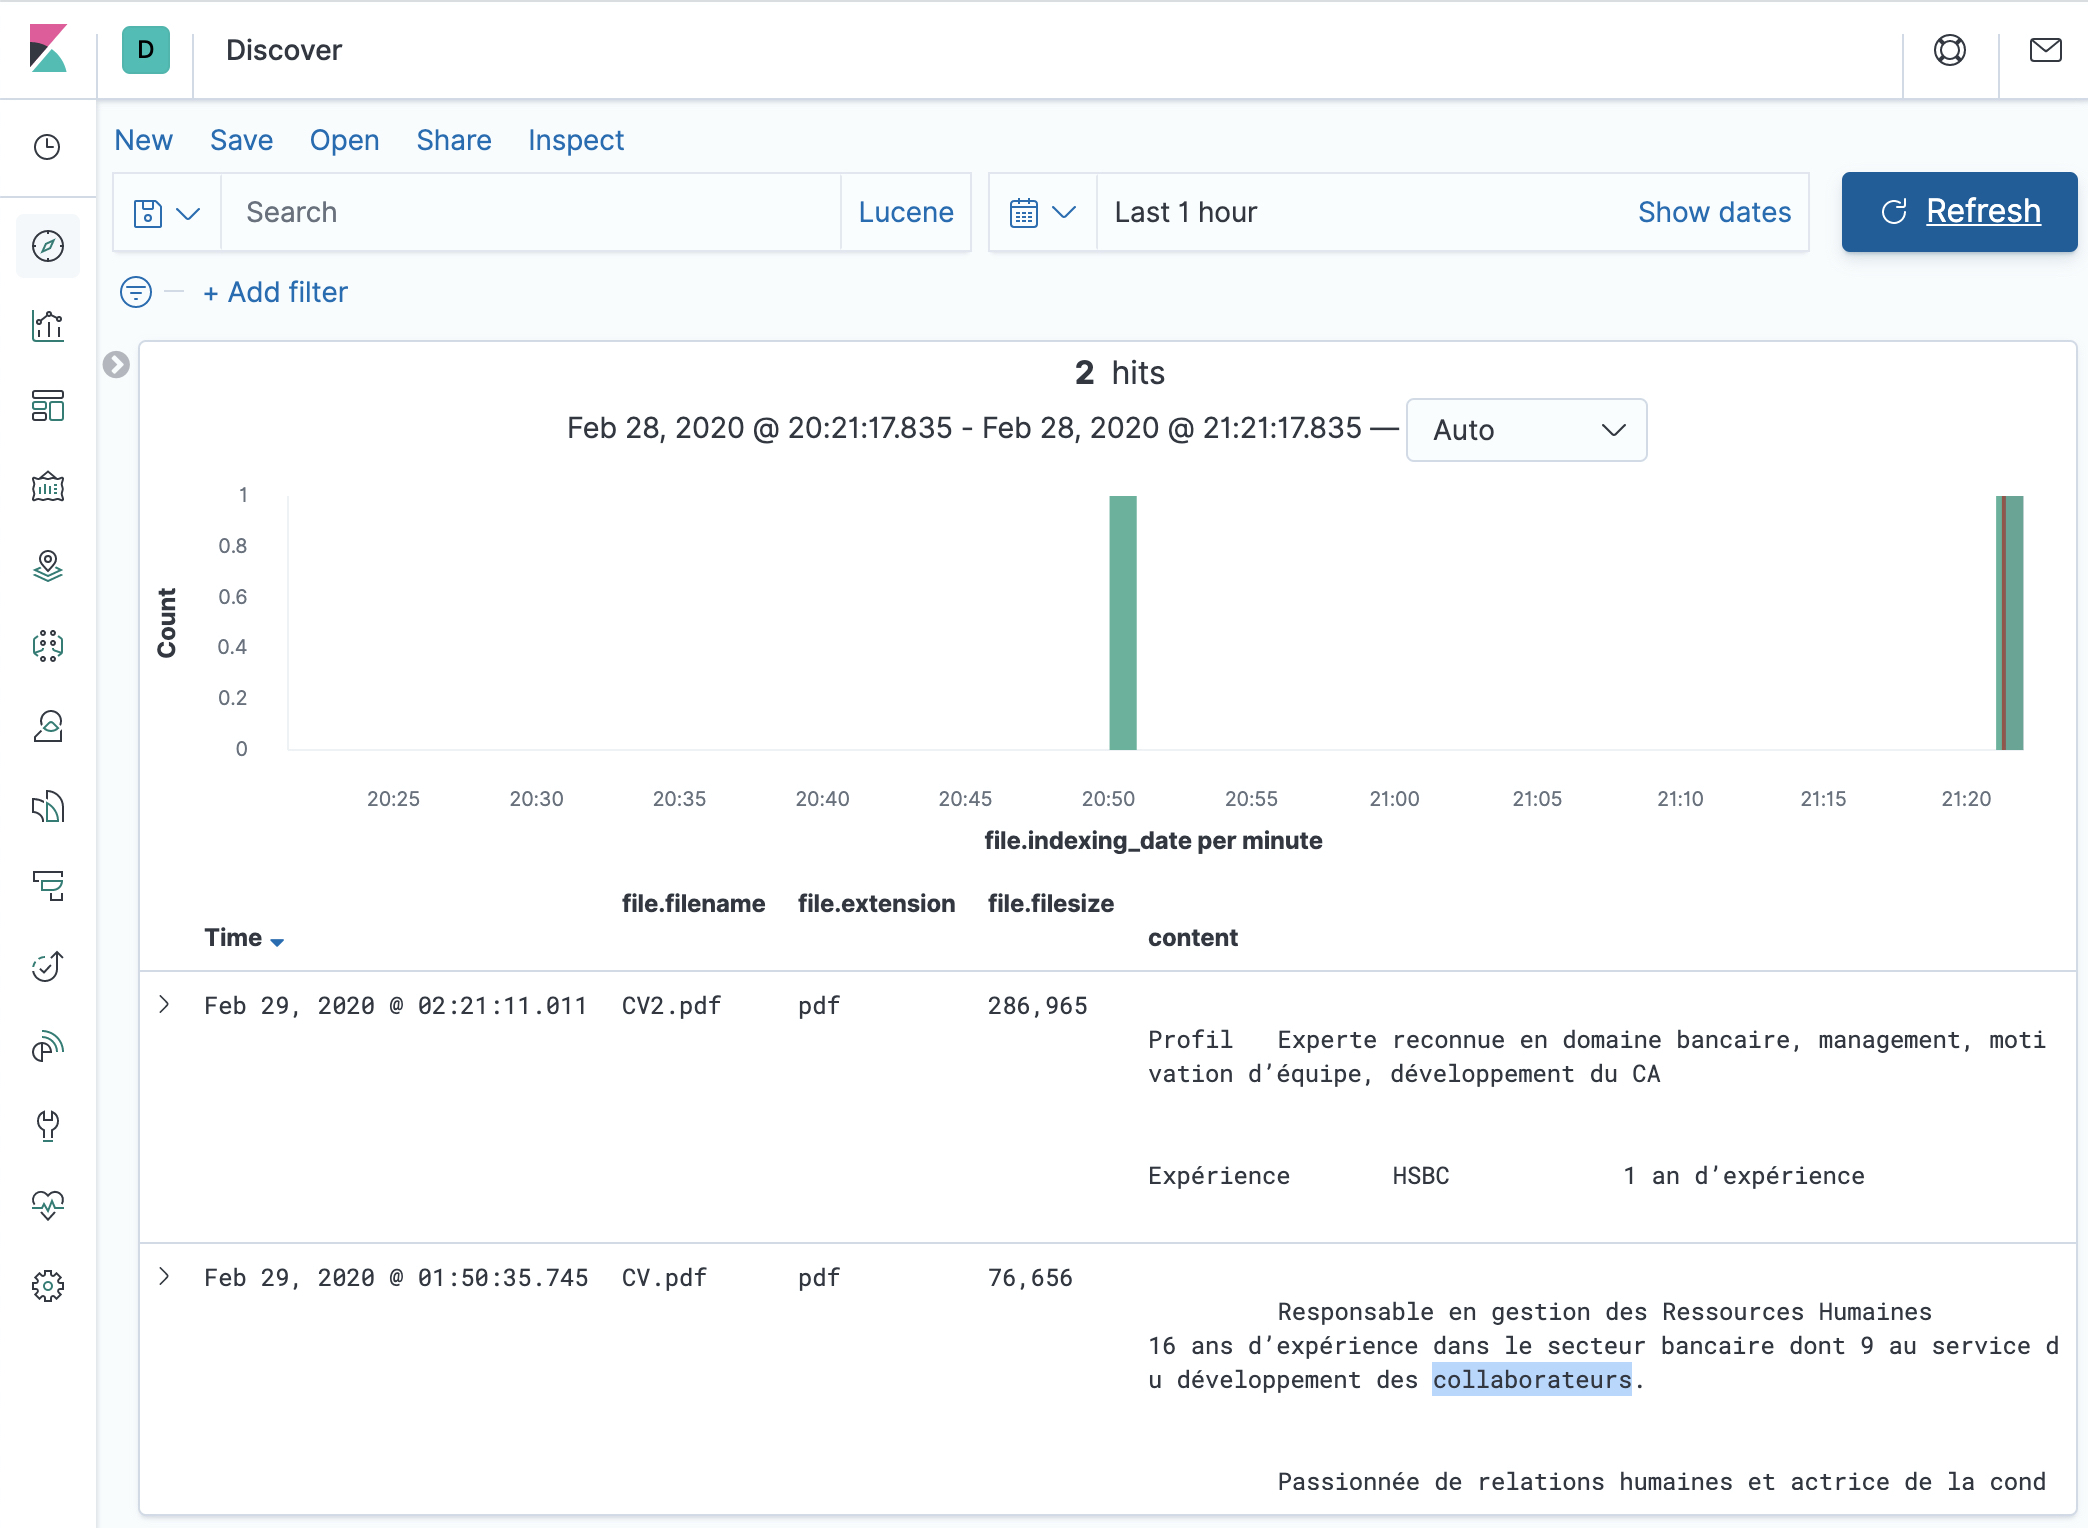
- Depending on the date you selected in the Create Index pattern step, you should see something similar to the following image. If you don’t see it, you probably have to adjust the time picker to make sure you are looking at the right period of time.
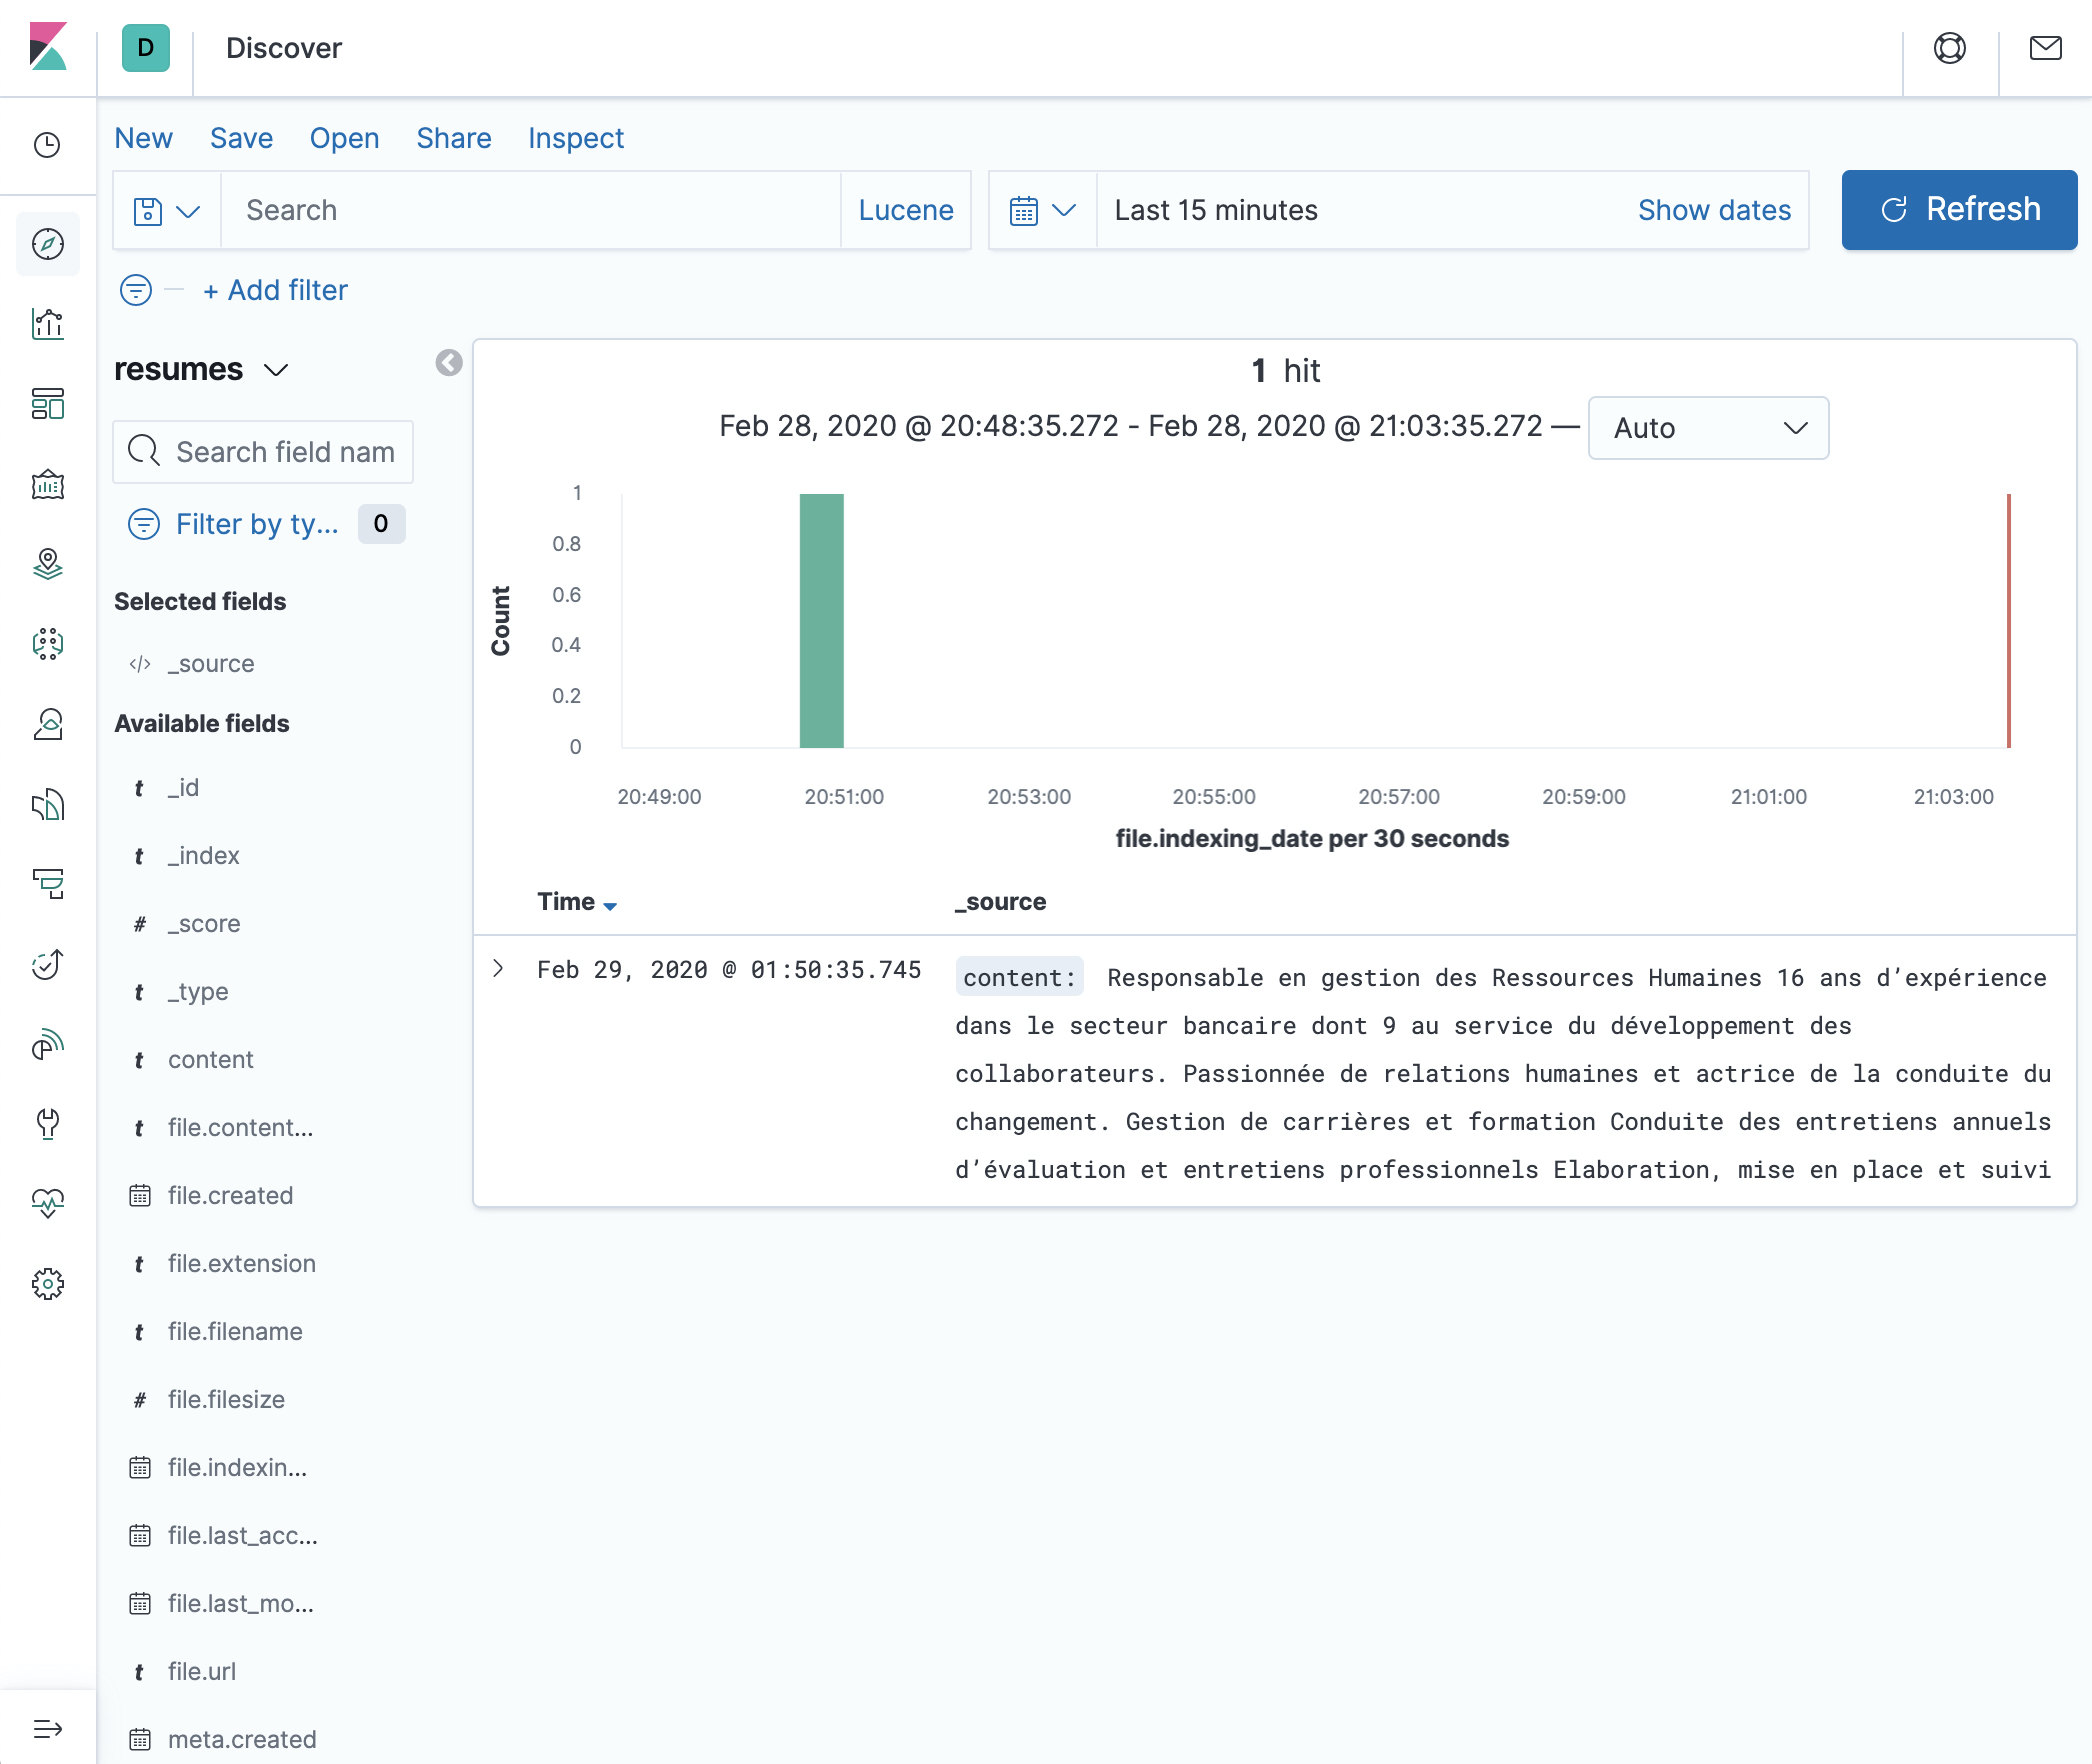
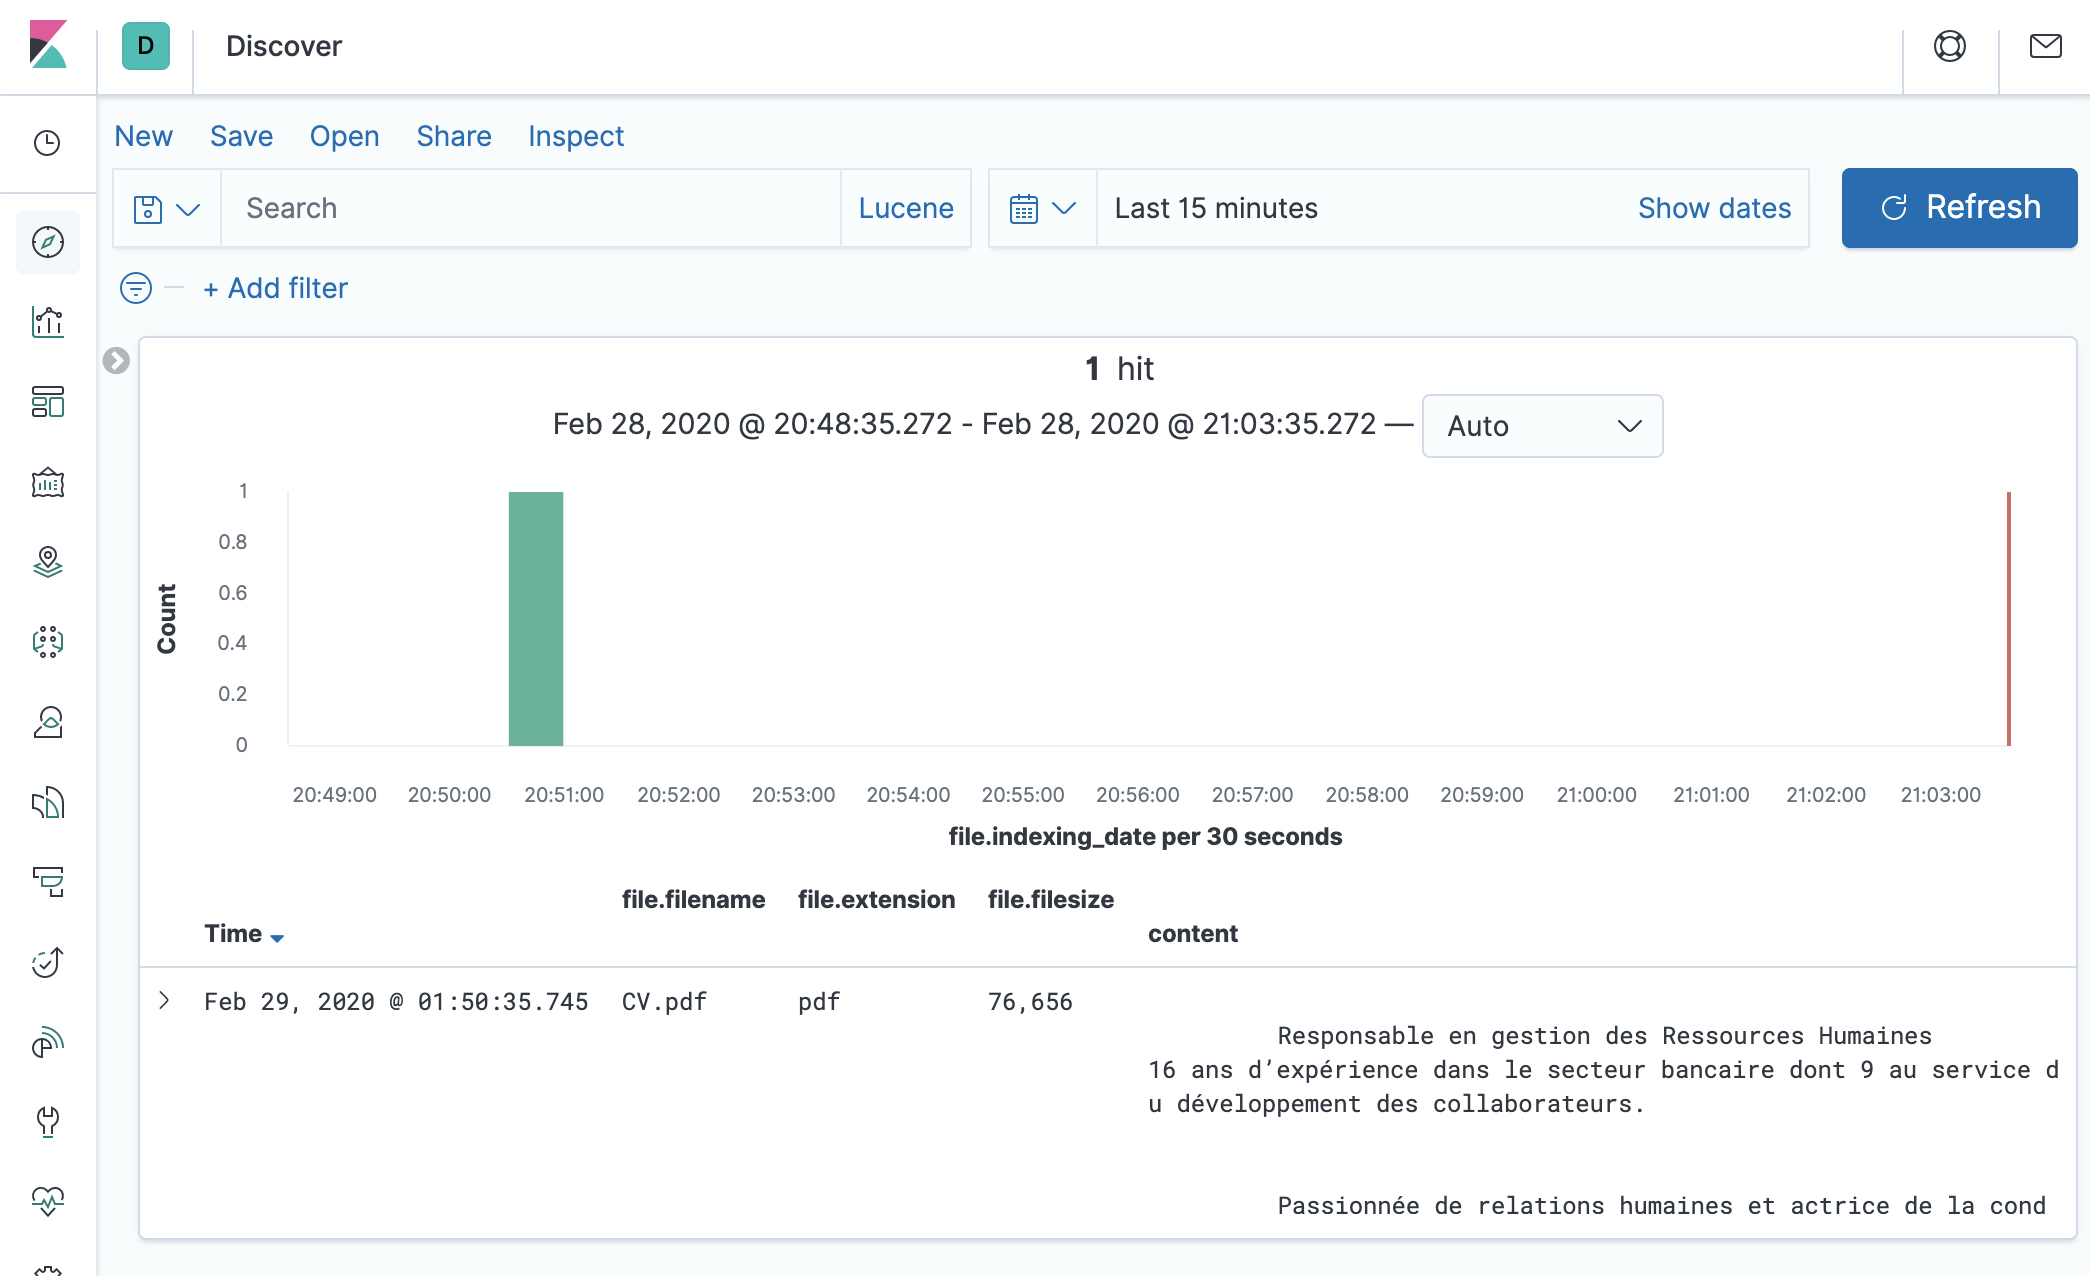
- You can select the fields you’d like to display in the result page, such as
content,file.filename,file.extension,file.url,file.filesize, etc.
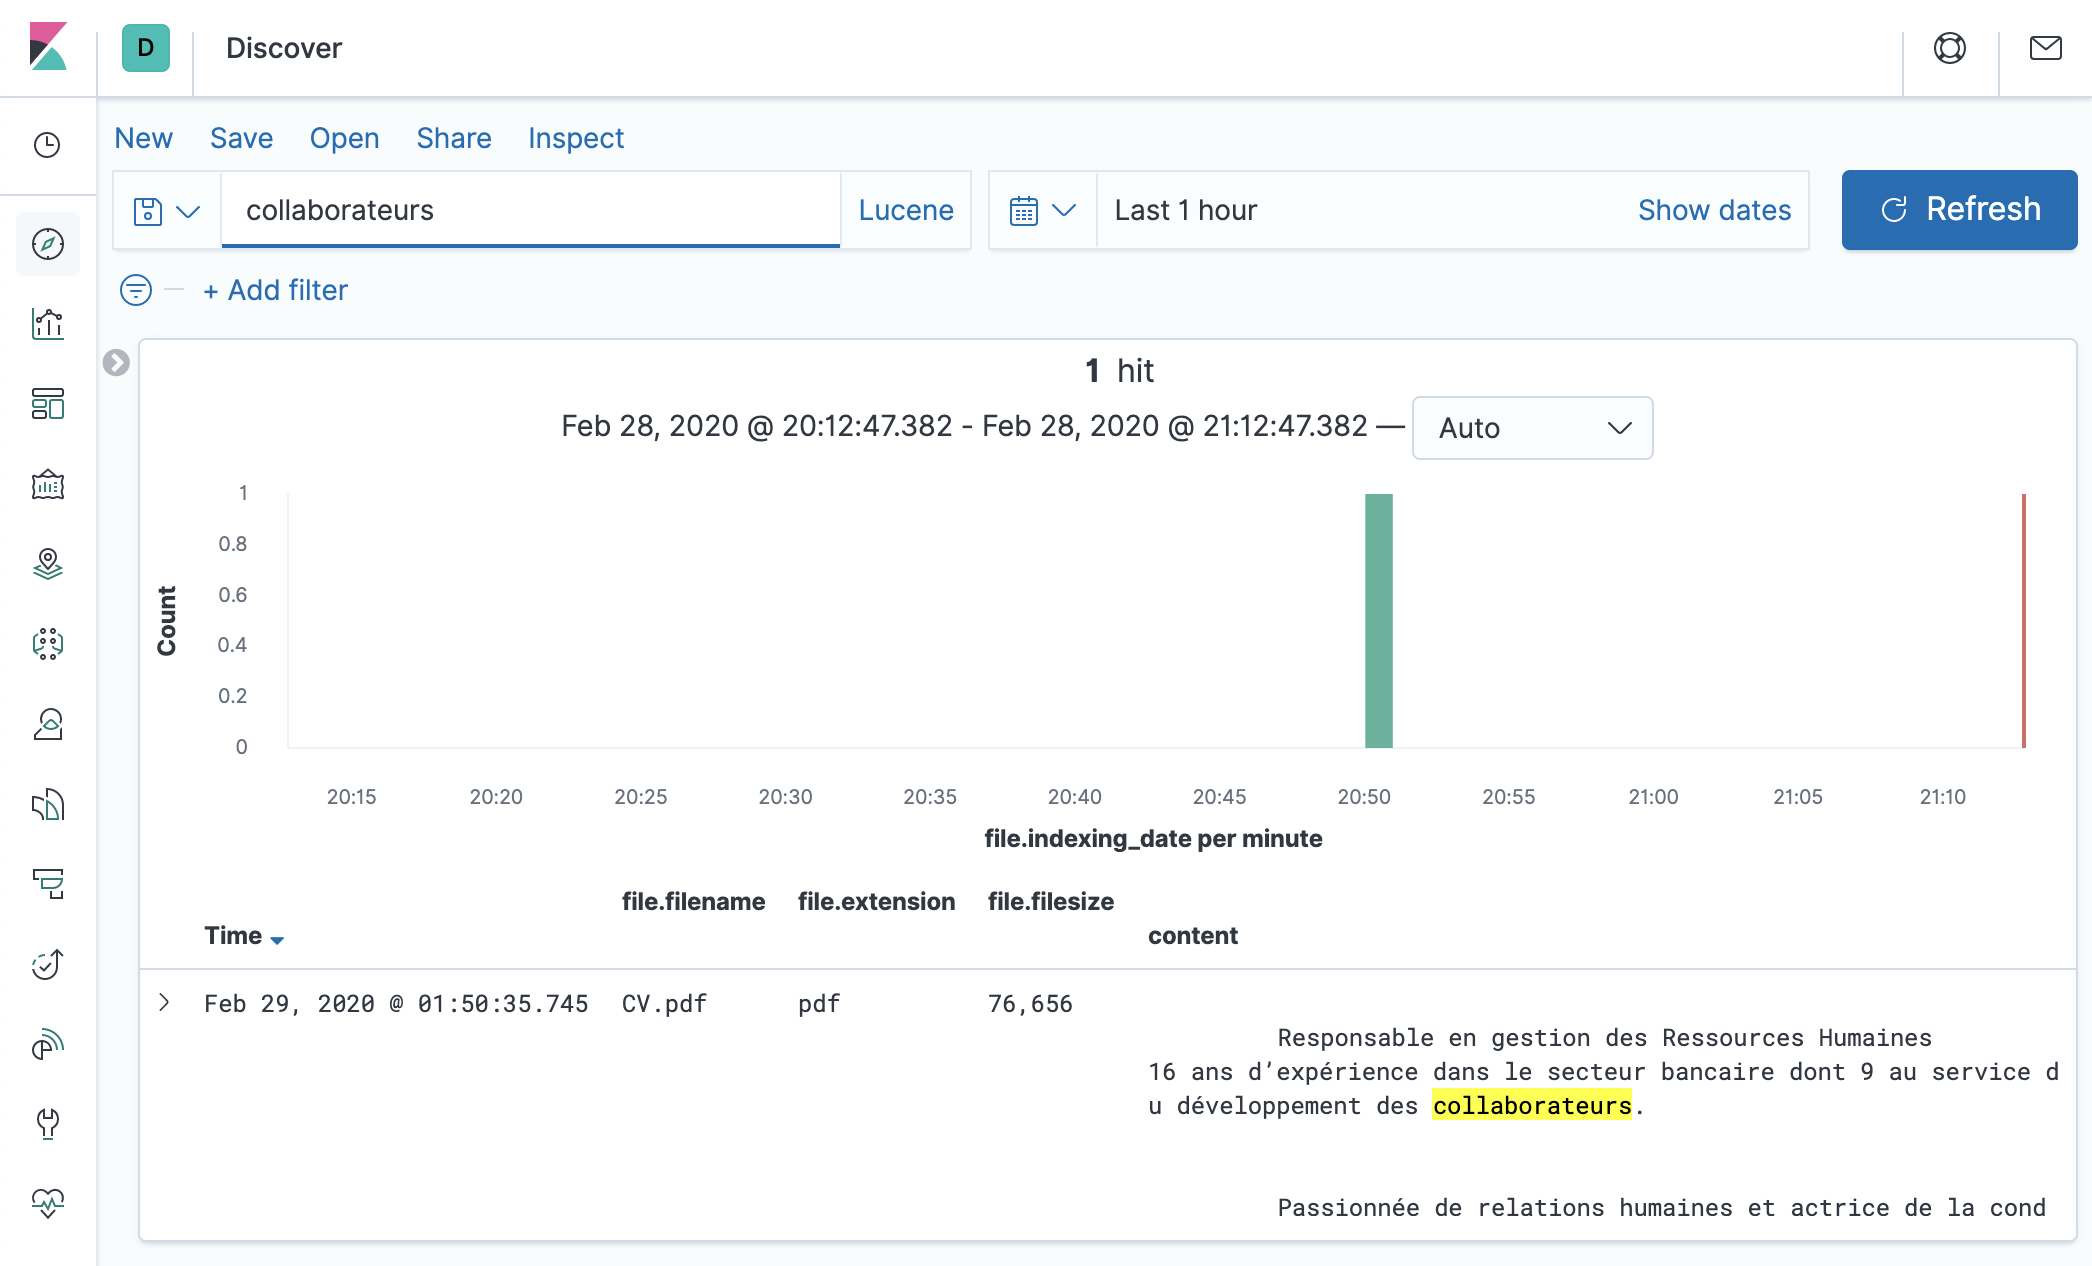
- Of course, you can search for content, like
collaborateurshere and see the highlighted content.
Adding new files
Just copy new files in the resumes folder. It could take up to 15 minutes for FSCrawler to
detect the change. This is the default value for update_rate option. You can also change this
value. See Update rate.
Note
On some OS, moving files won’t touch the modified date and the “new” files won’t be detected. It’s then better probably to copy the files instead.
You might have to “touch” the files like:
touch /path/to/resumes/CV2.pdf
Just hit the Kibana refresh button and see the changes.